Sunday, April 21, 2013

Next Projects: Lady Sidney ensemble and a Dutch Coat

The next projects on the docket are pieces for cast members of Bristol. I'm very pleased to be making an ensemble (gown, forepart, sleeves, and hat) for my friend who joined the same year as I did and, ask anyone, playing maids of honor we were virtually inseparable that first year...
...strolling the streets...
...loitering in meadows...
...and scoping out the boys.

Six years later, she now plays Barbara Gamage, Lady Robert Sidney. Sir Robert Sidney, if you recall, is played by this guy...
...my real-life brother, whose outfit was also made by yours truly. 

So I always sketch outfits to confirm the overall look and general direction of the details. 
The main parts of the overskirt and bodice will be a dark navy blue velvet accented with gunmetal-grey and golden-yellow. Some of the fabrics are still in the acquiring phase but a trip to Sol's in Chicago proved very helpful and enabled me to get started on the hat-action.
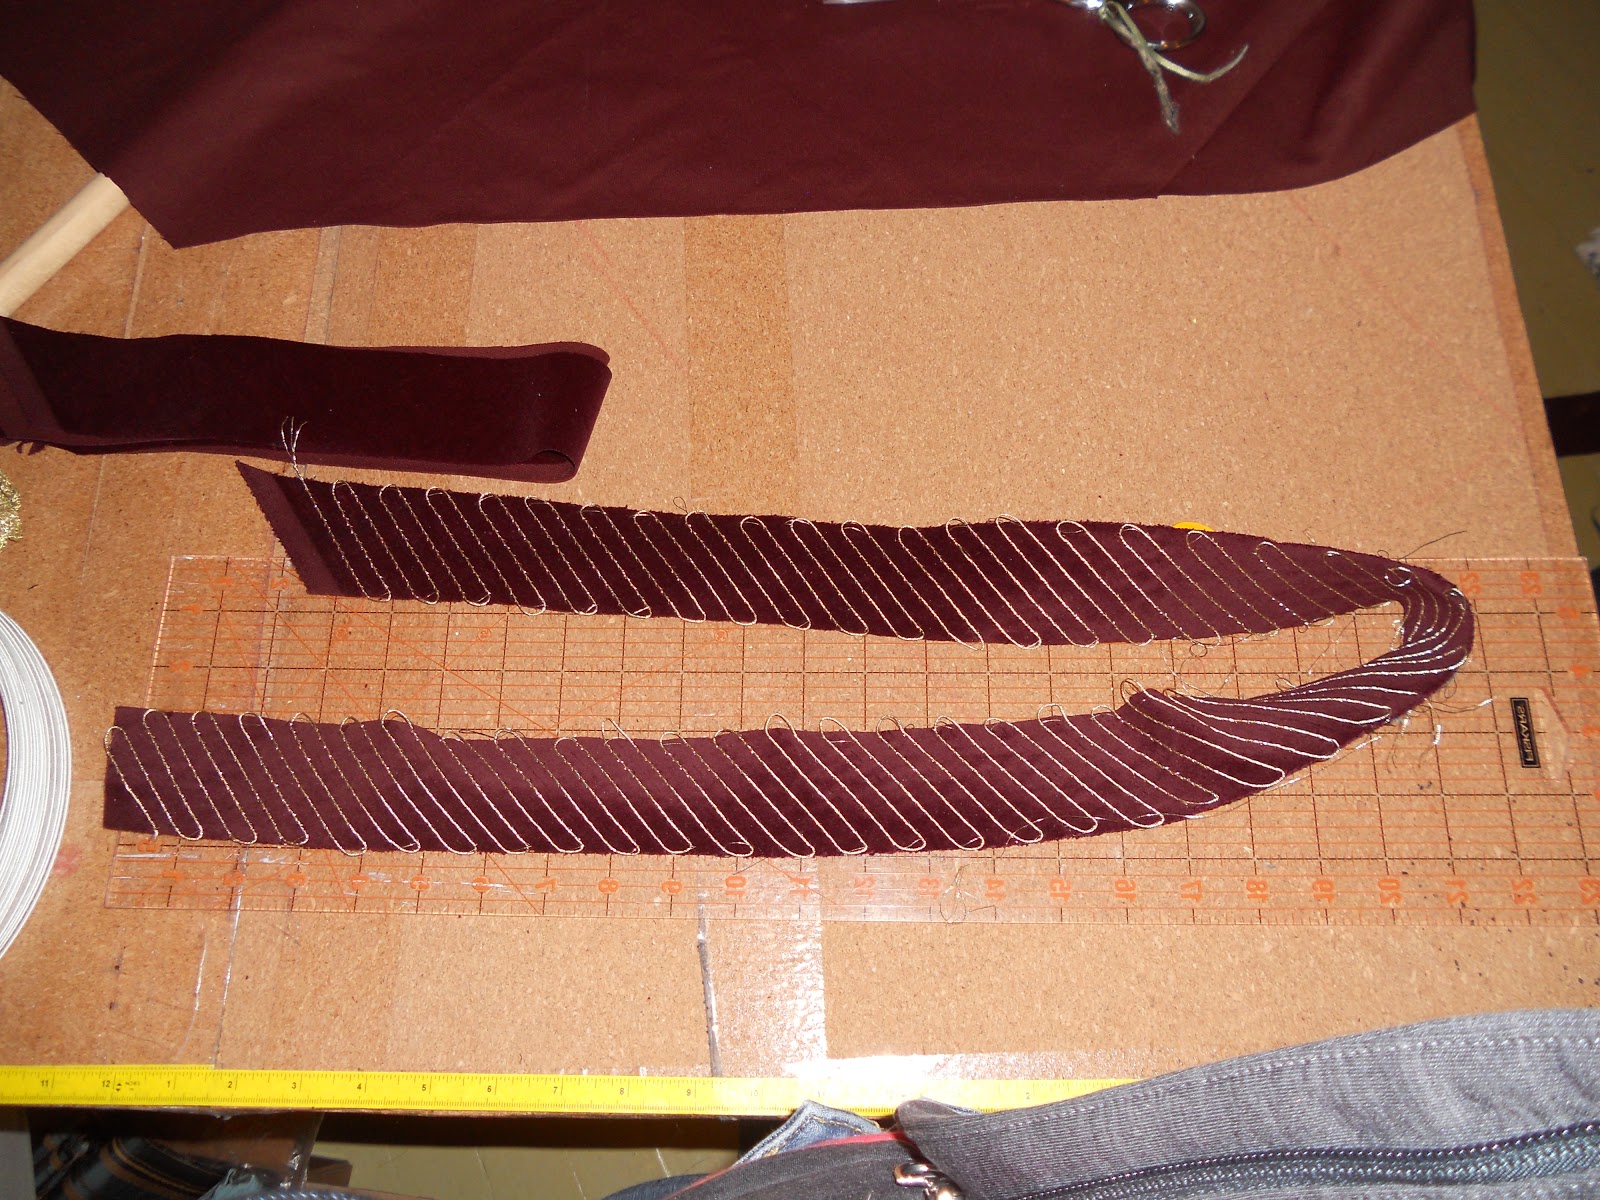
Behold! 
 Dark grey upholstery-weight cotton velvet
 Navy silk shantung brim-rim wrapped with gold cord
And my personal favorite find of the Sol's trip: gold/blue shot silk organza. Effffing awesome. Bias-cut strip tubed and puff-secured with gold cord. 

I believe my friend has a silver-or-pewter Sidney pheon (remember this?)
brooch/pin that will be showcased center-front (probable feather-action emanating)

Ok? Sounds good to everyone? Great.

Moving on!

The Dutch Coat is basically something between a short surcoat with sleeves but shaped more like and worn like a short-cape. This is the best period depiction of it I could find: 
I have no pattern for this but draped and drafted my own. I've handmade and beaded the trim, I'm now working on putting the trim down onto the cut pieces of red velvet. 


So that's that. For now. 


Wednesday, April 17, 2013

Leicester Suit Finished and in Action!

It was requested that I save this post until after the opening weekend and debut of the suit at the Original Renaissance Faire. This upcoming will be the 3rd weekend of 7 so there are many days for you to go see the show and the suit for yourself, however there are some great photos from the first two weekends I can't help but share and close the Leicester chapter on this blog.


The finished product before leaving my studio


And here are some great performance shots!

Like KenPhotology for this great shot!

Clarence Alford is the fantastic photographer on this one.

LOVE how the colors translate in B&W on this one. Thanks again to KenPhotology for this one.

I'm extremely pleased with how it turned out and Clayton is doing it much justice in the performance. 

I've got some more projects on the table for Bristol friends that I'll try to post on here as I go. 

Wednesday, February 6, 2013

Finished sleeves!

I did in fact finish the sleeves the following day! I've just been a bit busy to update.

Here they are!
(I still have to add ties to the top to tie into the doublet.)

Suuuper close up...

Open!

The doublet is the last piece to finish then there are closures and point ties and other little details before it's all done but it's just a few days work away.

On another front I've got a commission for a lady's gown for Bristol coming up as well so look for that project coming soon!

Friday, February 1, 2013

Hat done! Sleeves started!

I've changed my mind about how I wanted to do this hat a million times. I do love that striped fabric I found but it wasn't quite jiving with the other ideas I had for the hat. It took me a few times mucking around with it in a variety of frustrating ways to get to that point. Life and work and other distractions were chewing into my spare time and progress had slowed as I experienced a general sew-er's block. Now I have a  cold and a few days off and nothing else to do except sew. 

So I got the hat done!

So remember how I was doing this?:

Well I did more of it and used it to trim the brim as well as make the band.

 I LOVE this velvet and found some perfect "montana blue" navettes to spruce up the band
 (also the hat isn't that big, my styro head is just really small)


Then I started trimming and putting together the sleeves...

This seems to be a recurring image, this time w/ a bronzish brown cord on the light blue silk...


Then a bit of gold trim to make a 'cuff' look.

and a bit of the bronze on top of that to finish off that look


This is where I left them for the night.

Got a lot done today and it feels good. Maybe tomorrow I can get the sleeves done...

Monday, January 14, 2013

More Leicester Details


3 days of sewing. In my mind that means a ton of progress, right? Kind of. Until I can do a fitting for the doublet I'm working on all the other little things so after I finished the collar and epaulettes...

here they are...
(and yes the collar is exceedingly tall at the moment, will mark the correct height during the fitting)

...I moved onto cutting the sleeves, which will be open along the front seam with buttons. I decided to eke the lining out of what was left of the bronze. And when I say "eke" I mean master-the-expert-level-pattern-tetris-challenge.
I hated to have the one piece on the weft but as lining it shouldn't be noticeable.

I'm currently in a conundrum about trimming the damn things so that's on the back burner for now...

So I moved on to the hat!
And because I have an apparent allergy to buying/finding trim I decided to make the hatband from some of wine velvet and some gold trim. I want to sew on some blue navettes too if I can find the right ones. But if I thought making the skirting and epaulettes was tedious boy was I in for it...

There was supposed to be a video of making the band here but apparently even Safari thought it was too tediously mind-numbing to subject the internet to.

Basically it took two-and-a-half episodes of Star Trek:TNG to finish putting the trim down on this, oh say about 40inch strip.


so naturally I wanted to kill myself.

I also found some of this beautiful fabric to make some piping out of :


And I'm trying to do something unique around the brim so it kind of looks like this right now:
(I haven't cut out the crown-hole yet)

The hat project materials group-photo:

And here's the whole outfit sneak-preview group photo!

mmmmmmm shiny.......

Current plan:
Finish Hat
Find/Decide on trim treatment for sleeves
Make Sleeves
Fit Doublet
Finish Doublet
Finalize closures and Tie-In points at waist
Kiss it farewell and send it off!

Saturday, January 12, 2013

Annnnnd we hit the tedium...

Somehow this always seems to be my most hated and yet most favorite part of the process. It's that point you realize the devil is in the details but it's no ordinary devil. This one is luring you with shiny things and seductive visions of being hailed as the Queen of Beautiful Details!! And then you spend 12 hours in a heroic battle against the mundane armed with silk and velvet and cord, the battlefield littered with scraps of experiments, shredded threads of ripped out seams, sighs of frustration filling the air, only to walk away with the spoils of...4 little pieces of skirting.

Alright, alright, enough with the dramatics. This is what I did get done today.

 Cutting out the skirting pieces


Lots of futzing and finally settling on this...

which became this...

which became these...

which looks like this up close...

I also started working on the epaulettes and collar before I just got too tired.

Cut and stiffened by zigzagging rattail onto fusible horsehair canvas

Close up of the rattail cording.


Too tired to write anything intelligent or amusing at this point. So thanks again for reading and goodnight! Or good morning. whatever.

Thursday, January 10, 2013

Leicester Progress

Hey all!

Happy New Year and I hope everyone had safe and happy holidays. I've been working on the Earl suit in between holidays and flying and making good progress in just the last couple weeks.

Slops are nearly completed, excepting closures

Pre-waistbanded:


 Don't hate me but I built the inner-lining out of a pair of mens briefs. It's the perfect shape, maximum flexibility with near-zero chance of seam blow-out (and trust me, if you know my client you know why this is nothing short of necessary. YOU KNOW WHY!!) It was a conundrum of Phabric Fysics to line up the front seam of the bronze slop lining with the brief structure but I did it dammit!

Narrow-banded legs holes will ride juuuuust under the gluteus maximus for full shorty-slop effect.

 Avec waistband:

Equipped with stealth-pockets!


The lining of the pocket pulled out to reveal super secret zipper in seam of said pocket allowing access to the dark lair of betwixt-lining-and-inner-lining where stuffing/netting/filling/secret-documents resides.

This photo was meant to show said access to filling (in this case a bias-folded length of muslin designed to give weight and shape to the slops) but my camera freaked out I guess and melded one with-flash image with one without-flash image for this frankenphoto...

Ok enough sloppage...

Work has commenced on the doublet!

Flatlined to lightweight canvas

Vertical stripeage on the back...

And everyone's favorite: the Chevron effect on the front!

Adding a touch of texture to the fabric with this teeny gold cord here...

It's hard to see but I tried to get a close up of the fabric with one of the stripes picked out with the gold(left) and one without (right). 


 Then we add a dash of a slightly bigger gold cord on the edges just on the three central stripes on either side.

Next I'll work on epaulettes, skirting, and collar before putting the doublet all together. Then sleeves. Then hat. And maybe a surprise accessory...

That's all for now!