Wednesday, May 23, 2012

Final Stages: Gresham Doublet

Got a few days to get back to working on Gresham, which will need to be completed, delivered, and inspected within the month.

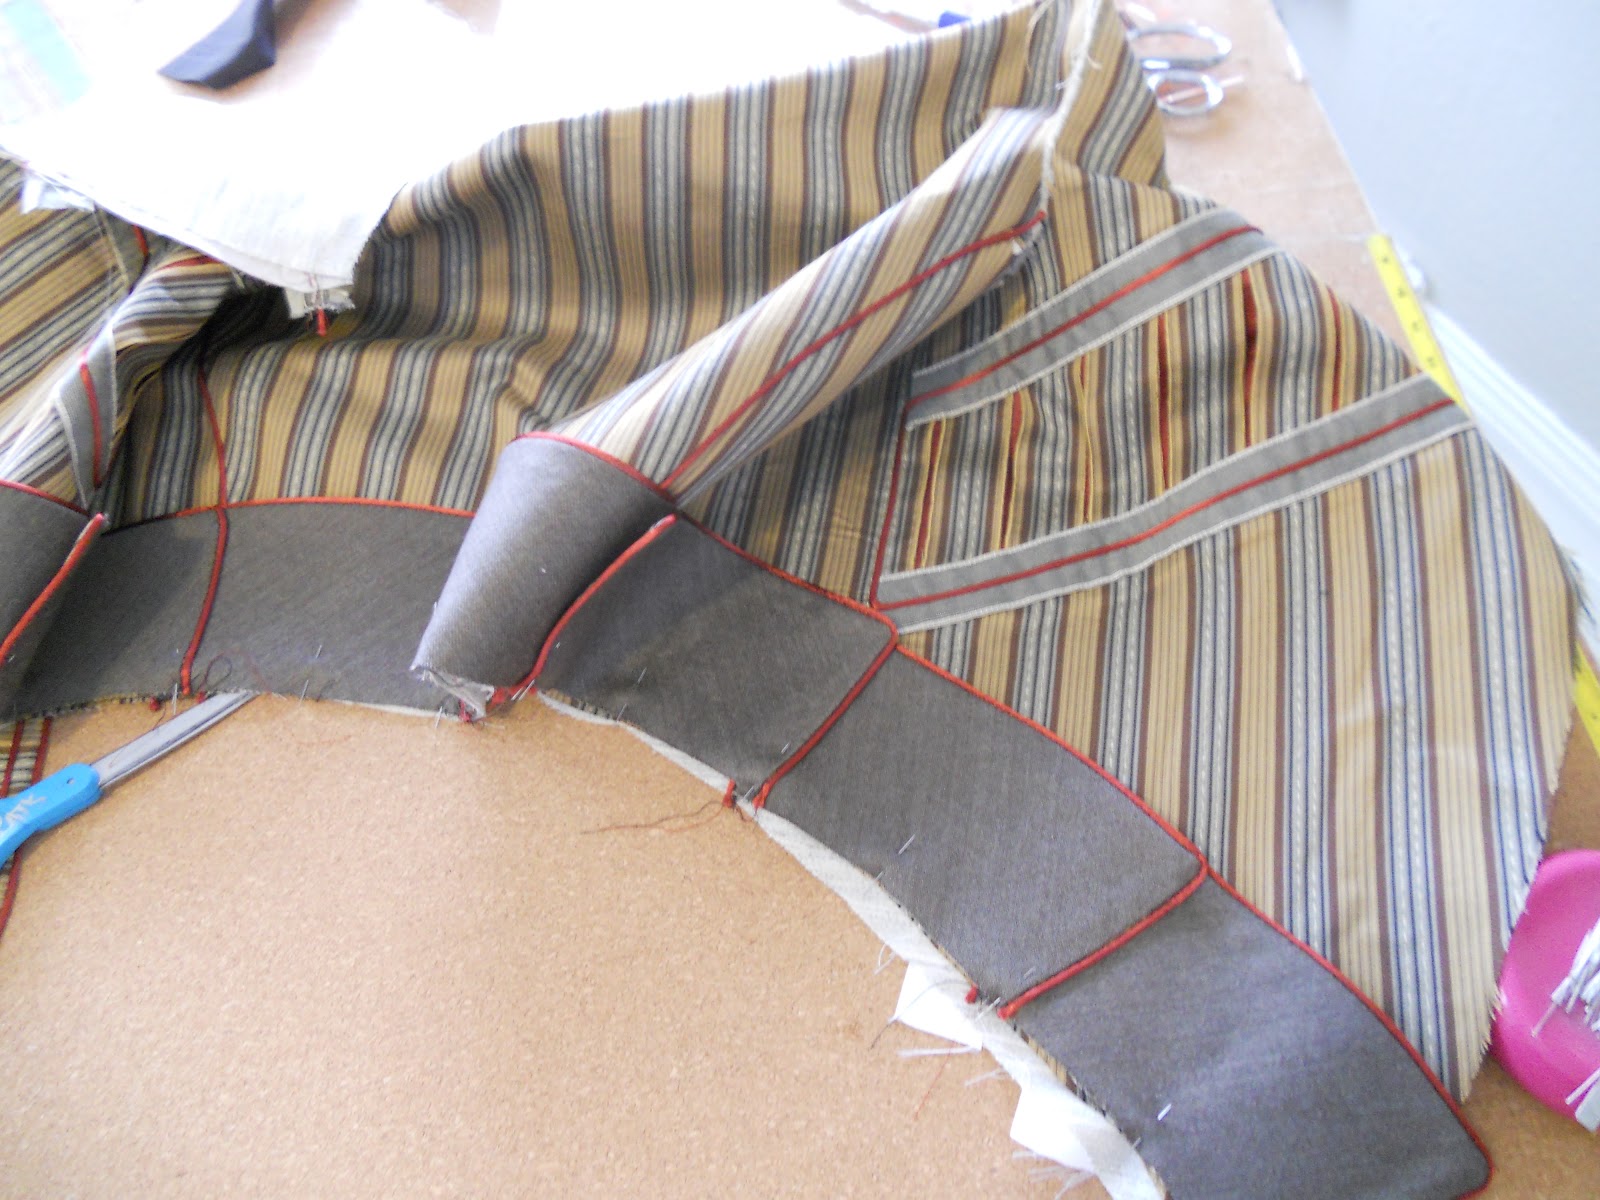
So I've been working on the skirting:


And the collar:


And just when I thought I was ready to throw it all together.. OOPS! Forgot about the epaulettes! So I did those too.

So it's not actually all together yet but here's what it's sort of looking like:


High Ho High Ho! Off to sleep I go!

Tuesday, May 15, 2012

Revolutionary Weekend!

Holy insert-favorite-explitive-here!!

The last 4 days have been completely mind-blowing! In so many ways.

First: Confession.
I have been struggling emotionally with the changes I've brought about to my life lately (as one friend puts it: after I've burned the boat ((see ancient Greek notions of no-turning-back))). Some of these changes have brought me face to face with some facts I'm not too excited to acknowledge about myself and way too much time by myself to face them.

This confrontation has been making me think awfully hard. Now that I've got some of the "what I'm doing with my life" lined up and sorted out I realize I have a LOT of work to do on the "what I'm doing with my heart, soul, relationships, humanity" part. These thoughts have been culminating for a couple months and primed me for some big thoughts which happened in the last couple days.

Mind-Blowing Thing One: I've started praying/meditating/contemplating again. I'm not going to go into the spiritual details of what praying is for me because it's just not my place to throw unwanted religious-talk your way (and I very much don't like it when others do this either). But basically the practice helps me become more comfortable with me and helps me feel centered.

Mind-Blowing Thing Two: I realized that I have to ditch this self-sufficient, my life is roses, I don't need soft feelings, I'm not like most girls, I don't do emotional stuff, invincible, invulnerable bullsheiss attitude I've been fronting for a while. If you want to know what brought me to this conclusion watch this video: TED Talk: Brene Brown: The Power of Vulnerability. Or listen to this song: Everybody. So I've been experimenting with vulnerability. I'm trying to stop thinking so hard about what I think people will think about what I say and just say and ask what I want and mean! Life, and I mean the emotional kind, doesn't happen when you're watching every word, every move, every gesture you make and trying to be appear completely self-assured and all-knowing. So I'm trying to let go of that. This terrifies me. But I challenged myself this weekend to do something I would never have done before (sorry I won't share the details) but it terrified me to even consider what I was about ask, but I did it. I let myself be seriously vulnerable and asked for a connection in response to that vulnerability. And I got it. The reward was not earth-shattering. The result was not ecstasy-provoking. The effect was so small, but such a big step for me.


Mind-Blowing Thing Three: I got to play Douglas Howard, Lady Sheffield, Baroness Sheffield with the Queen's Court at The Original Renaissance Pleasure Faire. I got to a see a show that was vastly different, vastly similar, and all-together eye-opening after not having played at a faire since I started my whole new life. On top of the above-mentioned real-life struggles, I discovered just how astronomically I need to grow as a faire performer. I had a terrible amount of fun and got to play with the cast in lots of fun, stimulating ways. But what made me uneasy was how many times I knowingly neglected the audience and how many times I wanted to engage the audience and felt incredibly awkwardly unable to do so. I found myself striving for belonging and approval from my adopting cast and simultaneously wanting to grow as a Street presence that the audience could connect with. Those two desires battled all weekend long and my vanity drove me to secure the former at the expense of the latter. Maybe achieving both was too much to hope for after more than 6 months away from performing and at a completely new venue where I literally had no clue where I was and playing a character I had little time to research and prepare. But the fact remains that I was again faced with my weaknesses and found myself yearning for growth.
The fact that I was paparazzi-ed like a movie star by photographers and even sketched by a Disney (yes we're talking Aladdin, Beauty and the Beast, Lion King, Little Mermaid Disney) animator/artist did serve to pump up my ego quite a bit. That was an amazing experience as well with evidence of my being there trickling in as photographers tweak their work and share it on the book of faces.
Here are some that I've found:
Photo by Mike McCauley
Photo by Christian Fredette
Photo by Joe Foley
Photo by Danny Rutherford
I do have to thank the cast and everyone at RPFS for welcoming me and playing. The show is really fantastic!

Mini-Mind-Blowing-And-Humbling-Things:
Got to enjoy an evening of listening to this guy: Mark Lewis. An amazing story-teller and bringer-together of people.
Got to enjoy the musical messing-arounds on guitar of a friend. Sure not so mind-blowing, but I'm remarkably musically untalented and love love love hearing guitar played live in a small room. It always makes the bad things seem to melt away or at least not seem so bad. (Note: when I'm rich I will hire someone to wake me up every morning with classical guitar - may be a live-in position...)
Got complimented and flattered by some people I highly respect.

Okay, back to..
Mind-Blowing Thing Four:

Two words: Easy Street. Ann-Elizabeth Shapera's brilliant book about performing and playing with the audience at Renaissance Faires. Oh yeah, if you don't know, Ann-Elizabeth is also known as Jane the Phoole. This woman
Photo by Chase Wirth
is a genius. I cannot extol the virtues of her book enough. So many of the things I struggled with this weekend were addressed in her book and I now feel like I have a map to inspiring my characters and finding that growth in my faire performances I was yearning. Even if you don't think you're a Street performer, you need to know what she has to share with you. Reading this book really blew my mind and I'm allowing it to catapult me into a new era of personal, emotional, professional, human-being-being growth. I could go on and on about this book but it's really best for one to read, listen, and discover for oneself why this book should be required reading for EVERY faire performer.

Ok. So there's the basics of my weekend. How was yours?

Thursday, May 3, 2012

Machines, Equipment, and Tools, OH MY!

I've been flying, trying to clean the apartment, shopping for car insurance, fixing up and gathering up my grey dress, all while fighting a glorious (albeit losing) battle with a cold this week so I've only been able to get little bits done for Gresham.

The best news of recent: I managed to swing a whole Saturday and Sunday in May off to go play with my friends at The Original Renaissance Pleasure Faire in Irwindale, CA! I've been wanting to visit Bristol's cousin on the west coast for several years now and thanks to my new job I will finally get there! SoCal has a phenomenal Queen's Court that I've been itching to see for myself! First faire of the 2012 season, here I come! 

That's why I've been tending to Grey-clyffe!


And here's what I've done for Gresham: Tab making!

I know, exciting, right?

Yeah, so that's not so exciting and because I don't have anything new to show I thought I'd give y'all a run down of my weapons-- err, tools! Yeah, tools and equipment of choice.

In no particular order...

Serger: White Speedylock Differential 1600. Kind of a hand-me-down/my mom still reminds me it's hers. But it's been on loan to me for almost 4 years.. so yeah... she reads this blog sometimes so I'm gonna stick with it's my mom's! Never had any major problems, other than the usual maniacal, sadistic tension tendencies of all sergers.

 My Iron/Steamer of choice: Rowenta Pressure Iron and Steamer. Provides great steam and takes tap water, takes a little while to get heated up so turn it on before you start working and don't forget to switch it off at the end of the day!

Dressform: Uniquely You Dressform. Aka the "Squishy Form" This type of form is really good for corseting projects because, as you guessed, it squishes to whatever shape you need it to! I think the sizing goes a bit big so I'd suggest getting a smaller one than you think you need. You can always pad out areas to be larger. Unlike most other dress forms it also has a realistic bust happening... also may scare kids if you leave the cover off... Think DD Madonna...

My cutting table: Sew Essentials Cutting Table, found at Joanns, but I've glued down cork so I can lay out fabric and patterns and just push-pin them down! Also helps fabric from slipping off. Collapses down to get out of the way when needed (but seriously you never fold it down because it always ends up as the place you put down anything and everything so it becomes totally full of stuff... yeah, you know what I'm talking about..)

My brain center: A cork board for stabbing up renderings, receipts, random things, inspirations, etc. And a whiteboard for to-do lists, jotting down measurements, sketching out schematics, and posting rules that only you will see or care about (like no color-matching after 5pm because the lighting in the room is whack) or reminders like W.W.(Initials of your role model here).D.

Iron board, sleeve board, and point presser/clapper. (And a broom, absolute necessity). If you don't have a point presser/clapper, I highly recommend one. It's one of those tools that makes the difference between clean, crisp pressed seams and corners and fuzzy, lumpy, thick ones.

And of course everyone needs a fabric closet! With bins and a rack for maximum fabric and costume stowage.

The little things: Left to Right Top to Bottom: 6x24in clear ruler, 2x18 clear ruler, hem curve, armscye/hip curve, Fasturn Tube Turners, measuring tape, beeswax, jean-a-ma-jig, marking chalk, marking wax, measuring gauge, tracing wheel, chaco-liner marking chalk, rubber thimble (aka rubber page turners), pins and magnetic pin cushion, bodkins, razor blade seam ripper, seam ripper, embroidery snips, craft and paper scissors, pinking sheers, Ghinger dressmaker sheers, back-up sheers.

And of course last, and in no way least... The Pfaff Select 4.0 atop a sewing table that I believe used to be sold at Jo-ann for at least $100 bucks that I found at Goodwill for $13.

That's pretty much the most of it! I've had lots of success with these items and I hope you do to! The better and more the tools, the easier, and often faster, the work. Yay!

Friday, April 27, 2012

Hi, my name is Kat, and I'm a Fabriholic...

I got back today from ferrying another load of my possessions from my parents basement in Wisconsin to my apartment in Washington. A good amount of those possessions are fabrics and with the return of my nice camera I decided to do an inventory of the fabrics I've been accumulating.
(Just a few of my favorites)

As you may have noticed by my "If You Find Yourself In" series, I find fabric stores, or just go peruse the red tag section at Jo-anne, and fabrics jump out at me. Cry out to me. BEG ME to take them home! I'm pretty sure I'm the Fabric Whisperer-- these fabrics have stories they want to tell and they come to me and trust me to release their spirit by realizing their story. It would be callous and cruel of me to deny them. Many times the fabrics I get aren't for any specific project when I find them but as other fabrics find me they meet each other in my studio and discover their destinies are intertwined!

Here's what's come together so far.

Sketch for a Venetian Courtesan gown:
 The fabrics that inspire:
 Copper organza, gauzy cotton with gold pin striping, tan/goldish damask, beaded embellishment, salmony/coppery silk with mettalic copper flecks, tan/goldish embroidered silk.
 A close up of the detail on the cotton for the camicia.
Pretty low on the priority list but I'm in love with the scheme!

Next:
Sketch for another Elizabethan set, possibly Radclyffe, but possibly not...
 Changeable teal/mauve silk chiffon, bronze and black ribbed heavyweight silk, mauve silk, teal silk, mauve Italian cotton velvet, antique cold cording.

The most gorgeous silk chiffon, it has such a beautiful hand. Divine.
Not sure where in the line up this one comes but I'm also very excited for putting these fabrics together!

No sketch for this one yet. I don't usually go for such primary color combos but I found the yellow fabric and just had to have it. Already had the red velveteen and that's black silk organza.


 Then I remembered the stripe fabric I found in Phoenix last month. (which is actually a blue/brown/red/gold stripe fabric but I'm going to cut out the blue part and just use the red/gold/brown bits.
Also undetermined priority level.

And lastly for now, it's my goal to make an Henrician gown so I can go play with courts at Henry VIII based faires. I'm not a big fan of the look of that period but I finally came up with something I'm happy with and the fabrics are delicious as well.
Airplane drawing, hence the wrong paper. Funny story but the idea for the trim overlay on the forepart was inspired by a fellow flight attendant's shoe straps. I had to sketch it out right away!

 I want to use the teal velveteen as the main fabric for skirt and bodice/upper sleeve. The strawberry-dun shell patterned fabric with be the forepart and under sleeve with a trim overlay and beading. The strawberry-dun silk will be the under portion of the bodice and the drapey-over hanging part of the sleeve.

This one is pretty high on the priority list as I'd like to be able to wear it to Henrician faires as they come up. I can always wear an Elizabethan gown but I really like to immerse and play so I'll be happier in the appropriate period wear.

I also have one Elizabethan dress in progress that will probably be the next project I work on, but I'll save pictures of that for another time.

Woohoo fabric!


Camera Issues Resolved!

I don't have anything new to show, but I have figured out a solution to my camera issues. Ok, well, the nice guy at Best Buy figured out a solution.. So here's the story.

One night I'm trying to upload pictures from my Nikon Coolpics. I find the cord and attempt to plug it into the camera. It doesn't quite go all the way in at first and, in a sad moment for evolution, instead of checking that I have the correct cord I just go ahead and shove it further in. Of course I decide after that to check the cord, and sure enough, it's the cord for my phone. I have now successfully bent stuff where the cord should plug in. After vainly plugging in the correct cord over and over again, I have to admit defeat as the camera proceeds to die from lack of charge-ability. This all occurs just before my big move out west and that is why only now do I attempt to find a fix.

Now we come to best buy so I can compare the plug-in site to a new camera and verify that my camera is indeed fugged up. So I ask the nice guy there if he thinks it would be an easy fix. He also verifies that the techy stuff in the little hole does look bent and suggests I could try to use a small screwdriver and bend it back, but it may have more unseen damage. He also points out that sending it in to get fixed would cost about $100 so I'd be better off buying a new camera. I say ok, great! NOT! At my look of despair he gets a brief thinking look on his face and tells me that I can solve the charging part by getting a separate battery charger (which my parents have a spare of so they gave it to me) and I can still get the pictures off of the camera by getting a memory card to usb reader for about $10! I did so and WOOT! It works. I also attempt to bend the stuff back into place but I have to wait to get back home to try plugging it in like normal. In the meantime, I will for sure be able to provide better pictures, and I may try to get new better photos of the things I've posted recently.

I'll get around to that but just to celebrate the return of the camera, here's one of my favorite photos I rescued from pre-bad-decision-induced-damage-era.
That's right! The happiest place on earth: Lambeau Field!

Ok, that's all I've got for now. Look out for better pictures coming soon!

Wednesday, April 18, 2012

Forging ahead!

So the doublet was always going to be the most painstaking part of this outfit, and I'm proving that by spending all day cutting, slashing, and trimming the doublet. (Admittedly I was also watching Bones and/or Elizabeth R and drinking Mike's Hard Strawberry Lemonade (I know super girly right?) so saying "all-day" is kind of an overstatement in regards to total focus, but you get the idea.)

So here you can see I've cut the fabric ever so slightly on the bias to give a very tall chevron effect to the front of the doublet. Then between the grey stripes I've basically made 4 inch buttonholes. I ran a buttonhole stitch with a little extra space in between to allow the red silk to show more. This allows me to achieve the slashed look without worrying about this (very fray-y) fabric fraying.

Then I used another multi-shade grey striped fabric to cut two strips of trim to frame the slashing.

Then to polish off the look and bring that red out just a bit more I went in and put down a strip of red rattail cord down the center


I was originally going to zigzag the rattail down but I really don't like doing that unless it's an edging detail. I think it interrupts the flow of the solid trim and looks belabored, especially against the shiny rattail. So I decided to try something I didn't think I could do with a cord. I edge-stitched the rattail down. And when I say edge-stitched I mean I barely caught the rattail as I went along. BOOYAH! It took some zany precision but I'm so happy with the result. It looks like the cord is just floating there! One more little trick to put in my pocket that might come in handy in the future (and opens up a ton of new design options *evil grin*).


So here's what that finished doublet front looks like:

Sometimes fabrics just fall into your hands off the rack and practically yell at you. This was definitely one of those moments. As I said before, this outfit is for a cast member who originally approached me and asked me to design the suit, before we knew I'd end up making it. So I designed it, including the color concept before I ever saw these fabrics. Then one day I'm in Loomcraft and I get no further than 10 feet in the door and all of these fabrics just jumped off their remnant rack into my arms and BOOM! Next thing I knew I was walking out the door with a bag full of fabric and shooting my friend an email letting him know I'd be making this. Sometimes a design or color scheme changes as you start fabric hunting and constructing but I'm quite impressed by the match. Here's the color palette I made up and presented to him with the design (before I ever saw these fabrics!)

It's even the exact shade of grey!! And grey is, believe or not, one of the hardest colors to match. Seriously, try it sometime. It sounds easy, how many greys can there be?? But once you start looking; good effin' luck!

So there's my triumph today. Little victories, right? Tomorrow I have my probationary review for my new job, so tune in next time to find out if I still have said job!

Tuesday, April 17, 2012

Just a Doublet Away!

So for some reason I've come to leave the doublet for last. I'm reluctant to say this is because I'm intimidated by it but it's probably true. Let me explain. No, a doublet would not usually give me pause but this outfit is for someone roughly 6 states away and although I have a full set of measurements, time and opportunity does not afford a proper fitting/ mock up before the outfit is needed. This is the first time I've attempted to make something that is, by nature, entirely dependent on precise fit without being able to ensure a precise fit via the usual avenues (see mock up/fittings).  And to conclude, the doublet is the least forgiving, in my opinion, of a poor fit and so makes me nervous.

That's why this is where I'm at:


That's right.
Hat - done, minus feather affixing
Slops -done, minus closures
Sleeves - done, minus ties at armscye
Chemise - done
Doublet - you haven't been reading, have you...

And the ever popular 3/4 view:

And remember those little red edged tabbies?


There they are! 

Simple shaped two piece sleeves, with just a hint of decoration. With the stripys on the slop panes, and the stripys that will be the doublet, I wanted the sleeves to be very simple, to give the eye a rest,  with just a hint of red which will bring out the bit of red... that you'll soon see in the doublet! 

Most of the last bits were done while watching episodes of Bones, but yesterday I discovered Bilgemunky Radio. Yes, that is an online radio/ podcast that is completely all PIRATE MUSIC! Now, I have pirate ancestors, but I know most of you are rennies as well and so are partial to the pirate scene. So if you feel like a bit of scallywag mood music, go check it out. Sometimes you just have to shake up the usual routine!

Thanks for checking in!